All your Gmail basics in one place!
A primer for newcomers to Gmail, which explains how to find your way around Google's innovative email service and to perform the basic email tasks of reading messages, sending messages and organizing your mail using Gmail's web interface. It also explains how to create and maintain your address book, and take a few simple customization steps.
For more in-depth information on the many advanced features of Gmail, visit the Gmail Help Centre.
Contents:
Chapter 1: How to sign in to your new accountChapter 2: Before you go any further
Chapter 3: What you see when you get there
- Inbox list - messages and their details
- Sidebar - Labels, Chat and Gadgets and how to switch between them
- Button bar - all the key actions in Gmail
- Search box - see Chapter 6
- Conversation view - how it works
- Reading Mail
- Sending new mail (using the new Compose features)
- Replying to mail (using the new Compose features)
- Forwarding mail (using the new Compose features)
Chapter 6: Finding your mail
Chapter 7: Contacts
Chapter 8: Customising Gmail
Chapter 1: How to sign in to your new account
This is the easy bit! All you need to is fire up your internet browser - Gmail works with the most recent two versions of all three mainstream browsers: Firefox, Internet Explorer and Chrome - make sure you are signed out of all other Google accounts and then type https://mail.google.com into the address bar. A sign in page will appear with boxes for you to type in your username and your password - fill the boxes and then click Sign In and you will be taken straight to your Gmail Inbox.

Chapter 2: Before you go any further
When you created your account, you were probably asked to give a mobile phone number or maybe another of your email addresses for verification purposes. These will have been stored in your Account Recovery settings, so that if anything goes wrong in future - e.g. you forget your password - you can easily regain access. So before you start using your account, make sure you have an email address in your Recovery options, and - preferably - a mobile phone number as well.
To do that, click your photo or email address in the top right of the Gmail window and choose Account to go to your Account settings page.
Scroll down to the box headed "Signing In", and click in turn on each of Recovery Email and Recovery Phone to set up your contact information.
Now you will always be able to quickly recover access if you forget your password or even your username! These settings can also be used by Gmail to create sign-in challenges when you first sign in from a strange location, when you might be asked to provide an extra security step, such as receiving a code by SMS to your mobile. As long as your recovery options are in place and up to date, you will have little difficulty in meeting any sign-in challenge.
Try this article for a complete run-down on account security and your recovery options: http://gmailaccountrecovery.blogspot.co.uk/#security (When you reclaim Your Account).
Chapter 3: What you see when you get there
Inbox list
When you arrive in your Inbox, you’ll see a list of all your messages - including both new single messages and and new messages that have arrived in existing threads (called conversations in Gmail) - in date order (and no, you can’t sort the list any other way!) For each new unread addition to an existing conversation or a new single message you will see the name of the sender in bold, any label you might already have given it, the subject, a brief snippet from the latest unread message in the conversation, and the date/time it arrived. (Hover over the date/time to get full information about both.)

Sidebar - Labels, Chat and Gadgets and how to switch between them
In a brand new account, the lefthand sidebar is populated with the system labels - Gmail’s alternative to folders - some of which are collapsed under the More... item at the bottom of the list, and a Chat list, usually empty in a new account! Newer accounts may have a Hangouts list rather than a Chat list - but the viewing options are the same for both.
NOTE: You will also see Circles, which is related to Google+ and can be ignored until you join Google+ and start building your circles of friends, colleagues and interesting people.
The space in the sidebar is divided between Labels and Chat - and it is divided dynamically. That means when you are working with labels, and have your mouse pointer in that part of the sidebar, your label list will have priority over the vertical space in the sidebar, but when you move your mouse pointer into Chat, Chat takes priority and will take as much space as it needs. The dividing line between the two moves up and down automatically. When even more space is required by either Labels or Chat, a vertical scrollbar will appear to enable them all to be viewed.
You can see this in the screen captures below - when the labels list is expanded by clicking on More..., it takes what space it needs and pushes Chat further down the sidebar.

You can control the spacing between Chat and Labels yourself to an extent by grabbing the dividing line and moving it up or down to suit how you use the sidebar most often. And if you don’t use Chat a great deal you can collapse it right out of your way, leaving all your space for labels, by clicking the little Chat bubble icon at the bottom of the sidebar - see below.

You can also swap the space used by Chat out to Gadgets - click the “ellipsis” icon to do that, and any gadgets you have installed will be displayed instead of your Chat list. They can be collapsed again by clicking the ellipsis. Any gadget you have installed will now be displayed in the sidebar instead of the Chat list.
To move labels that are hidden under More... further up, so that they are always displayed, grab each one with a left mouse click-and-hold and drag it up above the line.

To use the labels list, simply click on any of them to display the messages that have that label. Clicking on Trash, for example will show you the files you have deleted. Clicking Spam will show any Spam that has been caught by Gmail’s Spam filters, and clicking Inbox, of course, shows you your Inbox. For detailed information on how to use Gmail’s labels to handle your messages, see the Chapter called Managing your Mail below.
Button bar
You’ll also see a set of tools on the Gmail button bar - in list view you will see the Select button, the Refresh button and a More button with only one option on the left hand side, and on the right hand side of the bar you will see a message count, the Next and Previous buttons and the Gmail “gear” icon at the far right end.
The Select button offers a dropdown menu to select various kinds of messages, and if you click in the checkbox on the button itself it will select all messages on the page. The Refresh button refreshes your display. The gear icon gives you access to Gmail’s settings, themes and list density preferences. A recent addition is the option to Configure Inbox, which enables Gmail's new tabbed Inbox, although for the purposes of this guide, we are working in the normal single Inbox view of Gmail. See http://gmail-miscellany.blogspot.co.uk/2013/06/organizing-your-gmail-inbox.html for full information about the tabbed Inbox and the other ways you can organise your messages.

This button bar will expand as soon as you select or open any messages, offering you extra options to Archive, Mark Spam, Delete, Move and Label the selected/open messages. You’ll find added options under the More button as well.

If you would prefer words on your buttons, rather than the standard icons, then click the gear icon and choose Settings. You'll land in the General tab - scroll down to find Button Labels and swap to words.


Search box
See Chapter 6 for more information about the search box and how it works
Conversation view
Before we go further, a word here about Gmail’s default conversation view.
If you send or receive a message with a particular subject, then Gmail will group future replies that have the same subject with the original message (incoming or outgoing) forming a conversation. Conversations are presented from the top down, oldest first, newest last, with those in between that you have already read collapsed away out of sight.
The intention is to make it easy for you to keep track of the flow of messages within a conversation by keeping them all together in one place
If you don’t like it, and would rather see all your messages separately - as in Outlook or any other email client - you can turn it off by clicking the gear icon and choosing Settings. Click the General tab and scroll to Conversations, and turn OFF Conversation View. Save Changes.
Chapter 4: What to do when you get to your Inbox
Reading mail
To read your mail, just click anywhere in the message row to open the relevant message/conversation in reading view. You’ll see the content of the message, and a brief header showing you who sent it and to whom. To find out a bit more, click the little downward pointing arrow to expand the header.


If there are attachments at the end of the message, you will see them as thumbnails. To View most attachments in the Google Drive Viewer, just click the thumbnail. When you hover over the thumbnail you will also see buttons to Download a copy of the file to your computer’s hard disk, and Save to Drive, which will save a copy in your own Google Drive.

When you click the Download button:
- If you have a default Download folder set in your browser, the file will automatically be saved to that folder. If you don’t have a default Download folder set, you’ll see a Windows Save box pop up, so you can choose where to save the file.
- If you use Internet Explorer, IE will add an extra drop-down box when you click Download, offering to Open, Save or Save & Open the attachment. Beware of choosing Open - when you do that, IE downloads the message to a hidden temp folder. If you then edit the attachment and save it, you will save your edits to that hidden Temp folder, and the edited file will be almost impossible to find!

For lots more information about working with attachments, see Attachments in Gmail at http://gmail-miscellany.blogspot.co.uk/2013/12/attachments-in-gmail-2013.html
Now you are in the message reading view, you can stay there and just move on to older or newer messages/conversations in your Inbox by clicking the Next/Previous arrows in the top right.

If you delete or archive messages or mark them as Spam whilst in reading view, you will be returned to your Inbox list.
- LAB TIP: To prevent this, you can enable the Auto Advance Lab in Settings/Labs. Which will move you to the Next or Previous message following delete, archive or mark as Spam, depending on how you set it up in Settings/General.

Sending new mail (using the new Compose features)
To create a new message, just click the big red Compose button at the top of your lefthand sidebar. The Compose box will pop up in the lower righthand corner of your Gmail window.

There is a full range of formatting tools:

and tools for inserting images, links, smileys etc.

To use the Compose box, add an address in the To: address box, pick and type a subject in the Subject area, and then type your message in the main box. When you are done, click Send.
To add an address to the To: box you have a number of options.
You can type it manually if it is a new address you haven’t sent mail to before.
OR
You can start typing it manually, and Gmail will offer you any matching contacts it finds in your Contacts, and you can click on the one you want to use.

OR
You can click on the word “To:” and have the Contact Picker pop up - where you can choose the Contacts you want to send your message to. Pick the ones you want, and click Select to have them entered in the address box for you.

If you want to use CC or BCC as well as To:, then click “CC” or “BCC” to call up the relevant address box first, and follow the same procedure as above to add a contact to that address box. You can move contacts around by dragging them if you change your mind.

- NOTE - when you have finished entering addresses, and move down to the message area, the Recipients area will collapse to just basic info, giving you more space in the box for typing. To see the full info again for amending or checking it just click in the box and it will expand again for you. .

Save Changes. This will then be applied at the end of any message you send.
- TIP: f you want your signature to always appear right under the message you yourself are sending instead of at the very end of the message, including all quoted text, then go to Settings/General and check the box right under the signature panel, which will do that for you.

OR
Hover over the plus sign at the bottom of the box and click the camera icon when it appears. That will show you a Windows file selector where you can navigate to your file and select it for insertion into the body of your message.

If you want to attach a file to your message - a Word doc or Excel file, for example - you can also drag and drop it to the message box in exactly the same way and it will be uploaded and attached to your message. To attach a picture rather than having it inserted, drag it down on to the paperclip icon to make sure it is attached and not inserted.

OR
You can click the paperclip icon at the bottom of the box to call up a Windows file selector so that you can select your file
If you want more space to write your message you can pop the Compose box out to its own window. To start Composing in a new window from scratch, use Shift-click on the Compose button, and if you’d prefer a whole new tab, use Ctrl-click.
For a full run-down on how the new Compose features work, check out this article:
http://gmail-tips.blogspot.co.uk/2012/10/changes-to-gmail-compose.html
Replying to mail (using the new Compose features)
To reply to an email you have received, open it and click the Reply button in the top right, OR
Click Reply in the text box which appears at the bottom of the message.

When you click Reply, the name/s of the person/people you are replying to will be added for you automatically in the address box at the top, as will your own address as the sender. All the formatting and insertion tools are available as they are in Compose. All you need do to send an ordinary reply is type your message, and click Send
- NOTE: While Gmail always includes the text of the message you are replying to as quoted text, it is hidden by default when you start a reply. To reveal quoted text, click the little “ellipsis” icon to reveal it.

If you want to add other recipients for your reply, that were not included in the original message, then you can click in the address box and follow the procedure outlined above to add more To:, CC or BCC addresses.
If you want to insert pictures or attach files to your reply, follow the same instructions as for a new message above.
- NOTE: When you reply to a message, any attachments that the original might have had are NOT sent back with the reply. If you really want to send them back, click the More icon in the lower right of the Compose box and choose that option.
http://gmail-tips.blogspot.co.uk/2012/10/changes-to-gmail-compose.html
Forwarding mail (using the new Compose features)
To forward messages you have received to another person, either use the Forwarding option from the drop down menu next to the Reply button

OR
In the text box at the end of the message, click the Forward link.
OR
Choose Reply anyway, and then select Forward from the drop down menu at the left hand side of the address box

To select addresses for forwarding, follow the instructions above for Sending and/or Replying
.
Type a covering note at the top of the forwarded message - or not, if that’s your choice - and click Send.
- NOTE: Any files attached to a message you are forwarding will be automatically forwarded to your recipients.
For a full run-down on how the new Compose features work, check out this article:
http://gmail-tips.blogspot.co.uk/2012/10/changes-to-gmail-compose.html
Chapter 5: Organizing your mail
Labelling
For a comprehensive overview of how Gmail uses labels to manage your mail, please first read this article: http://gmail-miscellany.blogspot.co.uk/2012/10/how-gmail-stores-your-mail.html
To create a new label, either go to Settings/Labels and choose Create New Label
OR
In your sidebar, at the bottom of your labels list, click More and then choose Create New Label

OR
Select the message you want to give the new label to, by clicking in its checkbox in the message list, choose the Labels button from your top button bar, and again choose Create New Label

Once you have created a label, you can give it a colour to make it stand out from other labels. Put your mouse pointer on the label in the sidebar and you’ll see a little Options menu dropdown arrow on its right. Click there to choose your colours - you can also make decisions there about where you want the label to show up.

To apply a label to a message, open or select the message by clicking its checkbox, and click the Labels button. Check the label - or if you wish, multiple labels - that you want in the dropdown labels menu to apply it to that message/conversation.

- NOTE: A Gmail message can have several labels, so it’s always easy to find it. For example, a message from your brother asking about bookings for your vacation can be labelled as Vacation, Bookings and Family - so you’ll find it if you click on any of those labels in your sidebar.
Find the label in your sidebar, then left click-and-hold and drag it into either an open message or the relevant message in your message list


To view all the messages/conversations which have had a certain label applied to them, click that label name in your lefthand sidebar. That will give you a set of search results for that label. You can do this with your own labels and with any of the “system” labels like Sent Mail, Important or Starred, etc.

- NOTE: Unlike other email systems and clients, what you see when you click a label is NOT a “folder” full of duplicates, even when you can see the same messages/conversations in your Inbox or if you click any other label.
The list is just a “view” - a set of search results - of the messages stored in your account that have a specific label. If you delete a message or conversation from this “view” you will delete the only copy stored in your account. It’s particularly important to remember this when looking at your Sent Mail label.
Again, see the article here for an explanation in more detail:
http://gmail-miscellany.blogspot.co.uk/2012/10/how-gmail-stores-your-mail.html
Starring
In addition to labels, Gmail offers stars. The default is a yellow star, which you can select by clicking the star outline in your message lists.

But there are several more that you can enable in your Settings/General page, and once you’ve done that subsequent clicks will cycle through all those you have enabled, in whatever order you chose.

Archiving
“Archiving” in Gmail has one very specific meaning: it simply means “Remove this message from my Inbox” - and that is all it does.
It does not move a message, it doesn’t file it away somewhere different. It simply removes the Inbox label, so that you do not see that message any more when you click Inbox in your sidebar.
If you want to see it in future, look in All Mail. If you labelled it before archiving it, then click the label name in your sidebar.
“Moving” your messages
Moving is a bit of a misnomer - if you read the article at http://gmail-miscellany.blogspot.co.uk/2012/10/how-gmail-stores-your-mail.html you will see that Gmail consists of one large mailbox containing all your mail plus Spam and Trash. So in fact there is nowhere in GMail for you to “move” a message to!
When you “Move” a message or conversation from any defined Gmail view (i.e. any label view or your Inbox), all you do is remove the label belonging to that view and give it a new one. It’s still there in All Mail - just as it has been all along - it simply has a different label, and so will show up when you click that new label, rather than when you click the old label it had before.
- e.g. if a message is in the Inbox and you click Move, and apply a new label, then you will not see that message any more if you click Inbox - but you will see it if you click the new label you just applied.
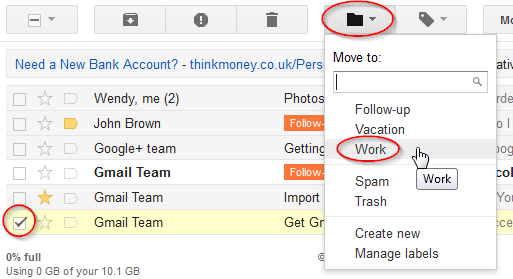

If you have already labelled a message and now want to change its label, click the original label in your sidebar to see the messages that have that label, then select the message and click Move. Choose the new label you want that message to have from the dropdown box - the old one will be removed and the new one added..
OR
You can use Drag and Drop - click on the original label name in your sidebar, locate the message, and then use the little “grabbie” hand that appears when you put your mouse pointer between the checkbox and the star selector and drag it to the new label you want it to have in the sidebar.

OR
You can do it manually - locate and select the message, and then click the Labels button. Uncheck the labels you no longer want, and check the new labels you do want. Click Apply.
Deleting Messages
Gmail always used to recommend never deleting mail, as the space allocated to you for message storage is so large - all you needed to do was archive. But people now use email differently, and there are far more space-hogging inserted pictures, videos and other big attachments flying around the internet mail system than before, so deleting mail you really do not want and will never look at again makes sense.
To delete a message or a conversation, select it and click the Trash button in the button bar. That will send it to Trash (or the Bin, depending on where you live!) where it will sit for 30 days before Gmail automatically deletes it forever from your account.

To delete one message from within a conversation without deleting the whole conversation, open the specific message concerned, click the dropdown next to the Reply button, and choose “Delete this message”.

All the while your deleted mail is in Trash you can recover it by selecting it and then clicking Move To and selecting Inbox - so it’s easy to put right any mistakes you might make, or change your mind about deleting a message and put it back into your Inbox or even give it a label and archive it instead.

You CAN empty Trash if you wish - click Trash in your sidebar and click the link “Empty Trash Now” at the top of the message list.
But unless you are getting dangerously close to filling your 10 Gb account space right up, it really isn’t advisable. Because once you empty Trash, your 30 day safety net for your deleted messages is gone for good - messages you have deleted from Trash cannot be recovered and are gone forever.
Using the Spam button
New accounts won’t receive much Spam, but after a while, if you use your Gmail address out there on the web, the spammers will “harvest” that address from other sites and will add you to their lists, and you’ll start receiving junk mail.
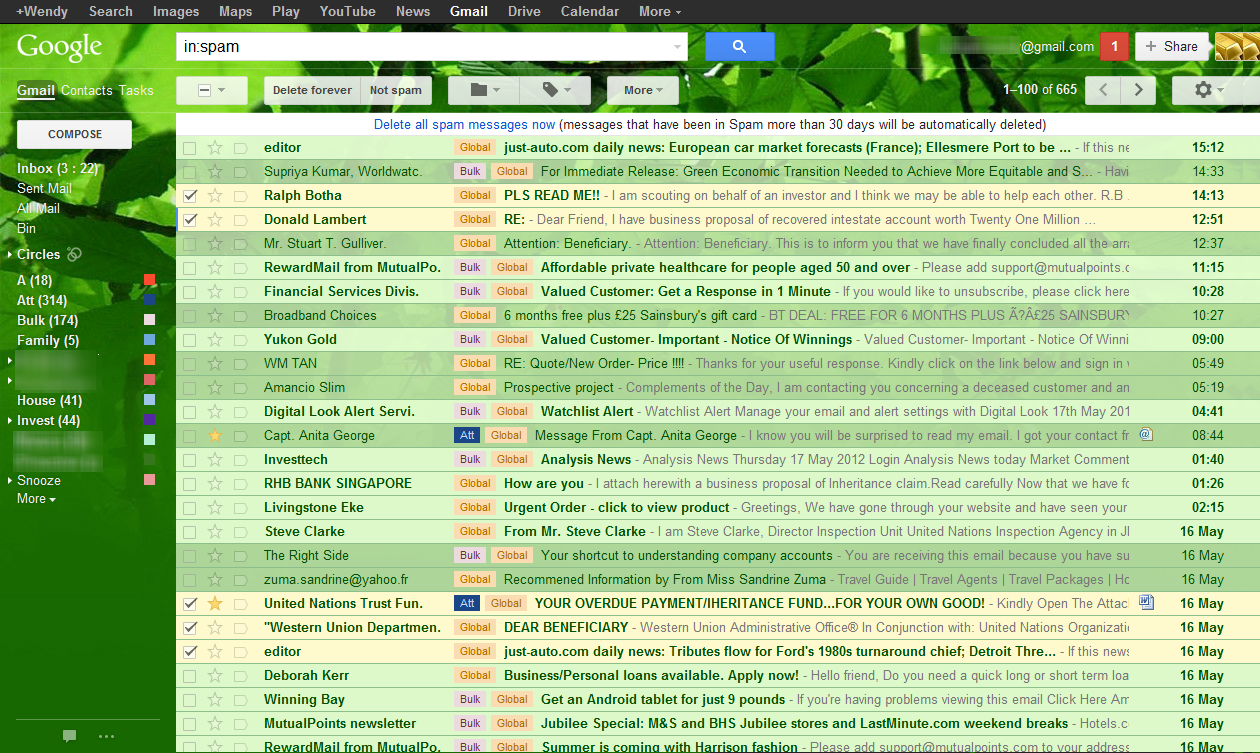
Gmail’s built-in Spam filter is one of the best in the business, and will divert most Spam out of your Inbox and into Spam, where it will sit (like Trash does) for 30 days before being automatically deleted from your account. All you need to do yourself is check Spam occasionally to make sure Gmail isn’t making any mistakes and isn’t sending “good” messages to Spam.
If you find a “good” message in Spam, select it and click the Not Spam button in your button bar. The Spam filter will take note of your preference and return the message to your Inbox. You may have to repeat the action more than once, but the filters are usually quick to react, and messages from that sender should not be sent to Spam in future.
If you find a Spam message in your Inbox, select the message and use the Spam button in your button bar to send the message to Spam. Again, the Spam filter will take note of your preferences, and mail from that source will stop appearing in your Inbox after a short while. You may find you need to use the Spam button more than once, but if you are persistent, the filters will catch on!
Again, like Trash, you can empty Spam if you wish by selecting the link at the top of the message list - but it will all be deleted anyway after 30 days on a rolling basis. And like Trash, messages deleted from Spam can not be recovered.
Chapter 6: Finding your mail
As we said right back at the beginning, you can’t sort your Inbox - by default, your mail appears in date order, newest at the top. But GMail’s search is fast and efficient, and can find just about anything you want.
There is a comprehensive list of all the search terms you can use right here in Gmail Help, but here are a few of those you will want to use most often:
- Subject - find any subject by typing “subject:your keyword” into the search box and clicking the blue search button
- Sender - find any sender by typing “from:sender’s name or address” in the search box - Gmail will search your contacts when you use “from:” in the search box, and offer you matching suggestions that you can pick from before clicking the blue button. A quicker way to find all mail from a sender is to use the hovercard - if you can see his/her name in your message list, hover over it, and when the hovercard pops up, click EMails
- Any word in the message - type the word into the search box and click the blue button. This can also search text in many common types of attached files, so if you remember receiving a Word document from a friend that contained a recipe for “pumpkin pies”, Gmail should find the recipe for you!
- Messages from a specific period - type “before:yyyy/mm/dd after:yyyy/mm/dd” into the search box, and Gmail will return messages sent and received between those two dates
- To find messages you have not yet read, enter “is:unread” into the search box and Gmail will find all your unread mail. If you want to restrict the search to your Inbox, use “in:inbox is:unread” instead.
That allows search terms to be combined for very effective searches - for example, “before:2012/06/01 from:David -football” will find messages from David sent to you before 1st June this year that were not about football.
The search box searches Gmail by default, but you can also use it to search the web - you’ll see the option offered to you in the autocomplete dropdown box if your keywords are relevant for a web search.
- LAB TIP: If you regularly use certain searches and don’t want to type them out every time, you can enable the Quicklinks lab in Settings/Labs, which will put a Gadget in your sidebar allowing you to save the search and then re-use it with a single click.
Chapter 7: Contacts
Contacts is the address book for your account. You access it in Gmail using the Gmail Contact Manager, which you reach by clicking on “Gmail” at top of your sidebar to show the main menu.

Most Contacted is a default Group, and simply shows the 20 people you have most often sent mail to in the past. There are also links to create a New Group or Import Contacts.
Like all Google products, contacts also has a search box, where you can find any contact you have entered by entering any of its details as keywords in the search bar and hitting the blue button.

NOTE: You will also see Circles, which is related to Google+ and can be ignored until you join Google+ and start building your circles of friends, colleagues and interesting people.
Adding contacts
Auto-add - Gmail auto-adds by default the address of everyone you send an email message to who isn’t already in your Contacts. The new addresses are added to a special category called Other Contacts, which means you can choose whether to keep them or not. The intention is that you should occasionally check your Other Contacts, delete the one-offs that you won’t use again, and transfer those you want to keep to My Contacts.
Manual add using the Hovercard - when you put your mouse pointer over a sender’s name, a hovercard with their details will pop up. If that sender is not already in your Contacts, you will see the option to “Add to Contacts” which will take you into the Contact Manager to a Contact entry card pre-populated with the address so that you can add other details.


Manual add using Contact Manager - to add Contacts yourself, manually, switch to Contacts, and click the New Contact button at the top of the sidebar to get a new blank Contact entry card to fill in. Gmail saves automatically as you make changes, but you can also click the Save button.

Importing - if you have names and addresses saved in another account, saved in an email client or just stored in a spreadsheet and you’d like to have them in your Gmail Contacts, you can import them.
- First export them from your other account or client as a comma separated variable (CSV) file, following the instructions they provide. Or - if you are using a spreadsheet - re-save your sheet as a CSV file.
- Open the file in a spreadsheet. Make sure the column headings (field names) are likely to work with Gmail. For example, although Gmail can understand a range of different field names, the names it uses itself are:
Family Name (i.e. last name)
E-mail (i.e. email address)
- Then switch to Contacts in Gmail, click the Import Contacts in the sidebar
OR
Click the More button and choose Import from there. - Gmail will give you a file selector box to choose your saved import file. Navigate to it, and click Open. Then click the Import button.
- Your contacts will import into My Contacts, and will also be available in their own special Group in the sidebar called “Imported...” + the import date
Contact Groups are a little like labels and work in some similar ways. Just as message labels let you see a single message stored in All Mail in lots of different ways, so do groups allow you to tag a single contact according to the different ways you use that contact. In Contacts, the equivalent of All Mail for messages is My Contacts plus Other Contacts. For example, your friend Joe is listed in My Contacts, but you can also add him to - for example - Friends, Football and Sports Club Groups - his entry in My Contacts will be tagged with those Group names, and when you choose to send mail to one of those Groups his address will be pulled out of My Contacts and put in the address box.
How to build Groups - first create your New Group name by clicking on New Group in the sidebar. Give it a name and you will see it appear nested under My Contacts in your sidebar.

Then go through your contacts one by one, select them and add them to the new Group using the Groups button. It’s very similar to adding Labels to your messages - in Gmail you select messages and apply the Label. In Contacts, you select contacts and add the Group name.

So why use Groups? Groups let you quickly add many addresses to the To:, CC: or BCC: boxes in Gmail all at the same time. For example: if you run a PTA, you can put all your PTA parents into a PTA Group. Then to send mail to all of them, you just open a Compose box in Gmail and start typing PTA into any address box - To:, CC: or BCC: - Gmail will find the Group in Contacts and offer it to you as a suggestion in a dropdown box. Click the suggestion, and all the parents’ addresses will expand automatically into the box so that the message is sent to all of them.
OR
You can click on To: to get the contact picker, select the group, and choose all members.


Chapter 8: Customising Gmail
Gmail’s default interface is clean and uncluttered, with little colour other than your key buttons. There is not a great deal you can control about what appears on your screen, other than in small ways.
One of those small ways is the vertical density of the messages in your lists and other screen elements - find those settings directly under under the gear icon. You can choose from Comfortable - wide spacing, Cozy - medium spacing, or Compact - narrow spacing. But bear in mind that Gmail is "scaleable" - i.e. if you have a widely spaced setting chosen, and you reduce the size of your browser window, or change computers to one with a smaller screen, Gmail will drop down to less widely spaced settings, according to the screen real-estate available.
If you don't want the advertisement/information strip at the top of your Inbox listing, you can turn that off by going to Settings/Webclips and disabling it.

You can also choose whether to use the default icons on all your buttons or to use words - switch to words by choosing that option in Settings/General (see Chapter 3).
To personalise your page, try Gmail’s Themes, which you’ll find directly under the gear icon. Here are just a few of them:

There is a range of solid colour themes to choose from, some high quality graphic images, and other “classic” Gmail themes, many of which change each day, or according to the weather, or even according to the time of day. There are also two “custom themes” which offer the choice of a light or dark message list background, and allow you to choose from a huge range of Picasa-hosted gallery images, or if you prefer, you can choose or upload one of your own favourite pictures.
Here’s how your Gmail page can look with just the built in customisation tools.

If you are more adventurous you can try some of the suggestions in these two articles:
http://gmail-miscellany.blogspot.co.uk/2012/04/userstyles-for-gmail.html
http://gmail-miscellany.blogspot.co.uk/2012/06/beyond-gmails-themes.html
NB - This article tries to keep pace with the changes in Gmail, and was last updated on 12 December 2013
* Gmail is a trademark of Google, Inc. This page is not sponsored by or affiliated with Google.